Friday, December 08, 2017

snowflake gift bags | pebbles


If you're looking for a quick and easy little gift bag to share a yummy treat, I have a fun idea for you! I shared this project last winter on the Pebbles, Inc. Blog and didn't ever share it here!

Create a snowflake themed gift bag like this one by @wendysue using the "warm & cozy" collection and a few fun embellishments from the "home+made" collections by @pebblesinc


 Here's how quick and easy they are to make: Start by gathering the supplies.  
   
Create a snowflake themed gift bag like this one by @wendysue using the "warm & cozy" collection and a few fun embellishments from the "home+made" collections by @pebblesinc

The first step is to add the gold trim to the top and bottom of the plaid (it's sticky on the back, so this is so quick!) paper. 
 
Create a snowflake themed gift bag like this one by @wendysue using the "warm & cozy" collection and a few fun embellishments from the "home+made" collections by @pebblesinc

Place it on the bag front and secure with additional adhesive, and by wrapping the ends of the gold trim to the back of the bag.
   
Create a snowflake themed gift bag like this one by @wendysue using the "warm & cozy" collection and a few fun embellishments from the "home+made" collections by @pebblesinc

Next, "fluff" the snowflakes and layer them together.  

Create a snowflake themed gift bag like this one by @wendysue using the "warm & cozy" collection and a few fun embellishments from the "home+made" collections by @pebblesinc

And add them to the left side of the plaid piece - I like mine to hang off the edge slightly.
 
Create a snowflake themed gift bag like this one by @wendysue using the "warm & cozy" collection and a few fun embellishments from the "home+made" collections by @pebblesinc

Next, add a gold glitter circle sticker.  I used foam adhesive to add mine to the center of the snowflakes.  Now you have a pile of snow (just like my yard!) - or a snowflake-flower! ;)
   
Create a snowflake themed gift bag like this one by @wendysue using the "warm & cozy" collection and a few fun embellishments from the "home+made" collections by @pebblesinc

Cut the string off the pre-made tag and add some foam adhesive to the back.  Now tuck it next to the gold circle:
Create a snowflake themed gift bag like this one by @wendysue using the "warm & cozy" collection and a few fun embellishments from the "home+made" collections by @pebblesinc
   
Create a snowflake themed gift bag like this one by @wendysue using the "warm & cozy" collection and a few fun embellishments from the "home+made" collections by @pebblesinc

Use black twine or crochet thread to "connect" the snowflake center and the tag. Tie a bow!
   
Create a snowflake themed gift bag like this one by @wendysue using the "warm & cozy" collection and a few fun embellishments from the "home+made" collections by @pebblesinc

 That's it, now the bag is complete!

Create a snowflake themed gift bag like this one by @wendysue using the "warm & cozy" collection and a few fun embellishments from the "home+made" collections by @pebblesinc
   
 And it is so quick and easy, you can whip up multiple bags in minutes!  Add a little something to the inside and share the winter love!

Create a snowflake themed gift bag like this one by @wendysue using the "warm & cozy" collection and a few fun embellishments from the "home+made" collections by @pebblesinc

   
 Thanks for joining us today - I hope you have a wonderful wintery day! 

Supplies
 Home+Made Gold Circle Stickers (732621) 
Home+Made Phrase Tags (732639)

Monday, December 04, 2017

hot cocoa bar | doodlebug design

Hi Friends!  It snowed last night, so I'm definitely ready for hot cocoa season!  I recently shared this fun little hot cocoa bar over on the Doodlebug Blog (here) and wanted to share it with all of you in case you missed it over there! I always enjoy hot cocoa in the wintertime, especially around the holidays, and when I have fun little add-ins, it's even better!!

Hot Cocoa Bar Party by @WendySue with the "Milk & Cookies" collection by @DoodlebugDesign

I have a little buffet table in my kitchen, and for the next little while, it's going to be a hot cocoa station!  I used papers and embellishments from the "Milk & Cookies" collection to make it cute and fun!

I made these little cup wraps by cutting 1 1/2" strips of patterned paper and wrapping them around simple styrofoam cups. Where they cross in the middle, I punched a ladybug red cardstock circle and added a Christmas tree cute clip!  It was easy to put these together - and as a bonus, we won't get our cups mixed up!

Hot Cocoa Bar Party by @WendySue with the "Milk & Cookies" collection by @DoodlebugDesign

In the background here, you can see that I framed the cute Santa Scene - because it's so super cute and I just had to display it this holiday season!

Hot Cocoa Bar Party by @WendySue with the "Milk & Cookies" collection by @DoodlebugDesign

Of course, you can't have hot chocolate without a spoon to stir it with - so I embellished a simple mason jar and some fun wooden spoons with doodle tape!  Quick and easy and so much fun!

Hot Cocoa Bar Party by @WendySue with the "Milk & Cookies" collection by @DoodlebugDesign

And the hot chocolate...we love the individual packets around here - no need to measure!  (Except for that jar of striped goodness in the top right corner of the photo below - that's my very special, very favorite Hazelnut flavor cocoa!!) Of course, the best part is all of the extra sweetness that can be mixed in!

Hot Cocoa Bar Party by @WendySue with the "Milk & Cookies" collection by @DoodlebugDesign

I made these cute little candy bowls with a silhouette cut file and various patterned papers from the "Milk & Cookies" collection!  Then I filled them up with all of my favorite festive and "meltable" candies!

Hot Cocoa Bar Party by @WendySue with the "Milk & Cookies" collection by @DoodlebugDesign

I'm fairly certain there's a law against NOT putting a candy cane in your hot cocoa in December.  Wouldn't want to break any laws, right?!?

Hot Cocoa Bar Party by @WendySue with the "Milk & Cookies" collection by @DoodlebugDesign

I cut out these letters with my Silhouette and hung them on Chunky Twine before hanging them to the wall behind the sweet goodness!

Hot Cocoa Bar Party by @WendySue with the "Milk & Cookies" collection by @DoodlebugDesign

And if one banner is good...two is even better, so I made a cute little scallop banner to attach to the front of the tabletop!  I used my sewing machine to quickly stitch them all together!

Hot Cocoa Bar Party by @WendySue with the "Milk & Cookies" collection by @DoodlebugDesign

Are you craving some hot chocolatey goodness yet??

Hot Cocoa Bar Party by @WendySue with the "Milk & Cookies" collection by @DoodlebugDesign

Go ahead, put together your own little hot cocoa party bar - everyone will thank you!!


If you love this collection, hurry and snatch it up while it's on sale!  

Thursday, November 30, 2017

christmas gift trio | doodlebug design

**Edited to Add: You Guys - I just checked and this collection is on SALE right now!!  Click HERE to get a better look and to purchase!

Hi there friends!  Today I want to share a set of cute Christmas packages I whipped up with the fabulous new "Milk & Cookies" collection by Doodlebug Design!  I'm always in need of cute little boxes and bags for small gifts and gift cards and treats, so I was excited to get a jump start on my stash this year!  Here's a look at the set:


I'd love to share the details with you! Let's start with the Chimney/Santa gift box:


I think these two papers might be my favorite in the whole collection - I mean, come on, a Chimney with Santa on top?!? cuuuute!


I added foam adhesive behind the sticker, then embellished with chunky twine, a big Santa from the ephemera pack, and three sparkly glitter sprinkles!


Next up is the Tree print gift bag:


I used a Silhouette cut file for this sweet little gift bag.  Again, I tied with chunky twine and added a sticker to the front with foam adhesive for dimension.


Isn't that little tree so sweet?  It looks like it took a lot of work, but guess what?!? It's a doodle-pop and ALL the work was done for me!  Those cute little ornaments, the layering, all of it!  All I had to do was peel and stick! ;)


Finally, here's the cutest little milk carton gift box ever!


Again, I cut the box with my Silhouette, tied it with chunky twine, and added a sticker to the front with foam adhesive squares.


As far as embellishment, I had to add the milk and cookies from the ephemera pack, of course!


Oh, and did you happen to notice that little banner in the background?  It's simply triangles cut from the 6x6 paper pad with holes punched in the corners and connected with doodle twine!


Thanks for stopping by the blog today - I hope you're inspired to create some cute gift packaging with the "Milk & Cookies" collection!


Thursday, October 12, 2017

trick-or-treat halloween banner | doodlebug design

Hi friends!  Can you believe Halloween is only a few weeks away??  Didn't we just celebrate the 4th of July?  I swear we did.  Anyway, I wanted to share a fun little trick-or-treat banner I made with all of the cute little trick-or-treaters in the "Booville" collection by Doodlebug Design!  I shared this project a few weeks ago HERE on their blog, but wanted to share it here too!

Here's how the banner looks hanging in my kitchen:

"Booville" Halloween Trick-or-Treat banner by @WendySue for Doodlebug Design

And here's a closer look at all of the pieces (I'll link to all of the products below, so scroll all the way down to buy the supplies to make your own!!):

"Booville" Halloween Trick-or-Treat banner by @WendySue for Doodlebug Design

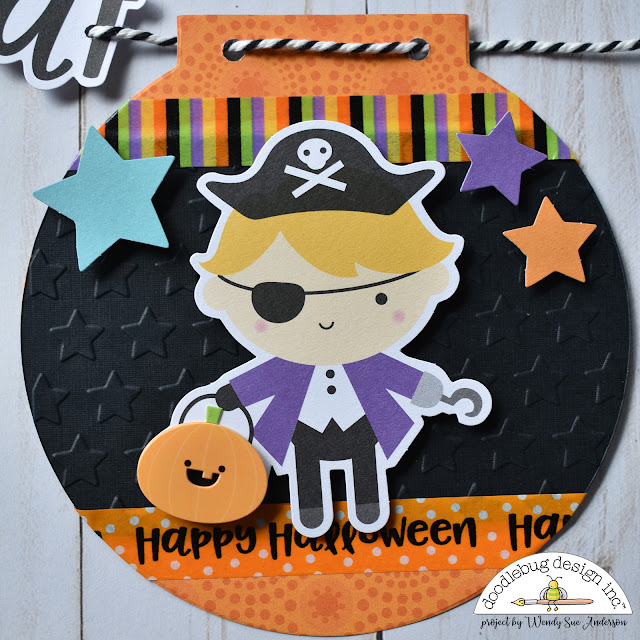
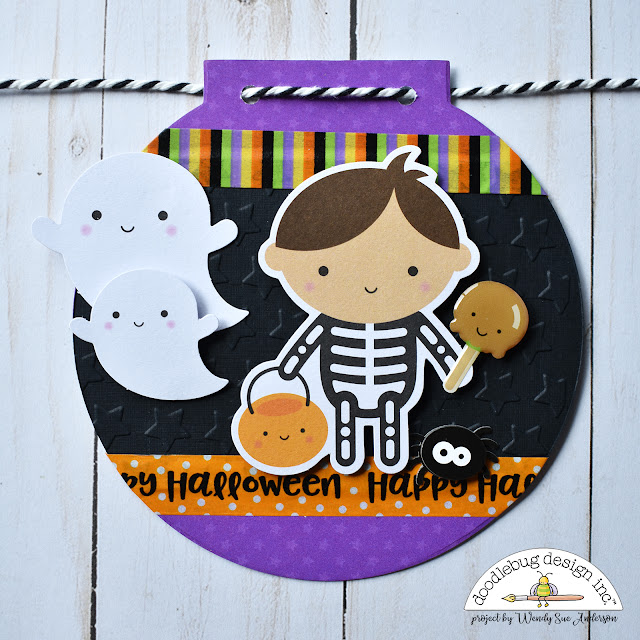
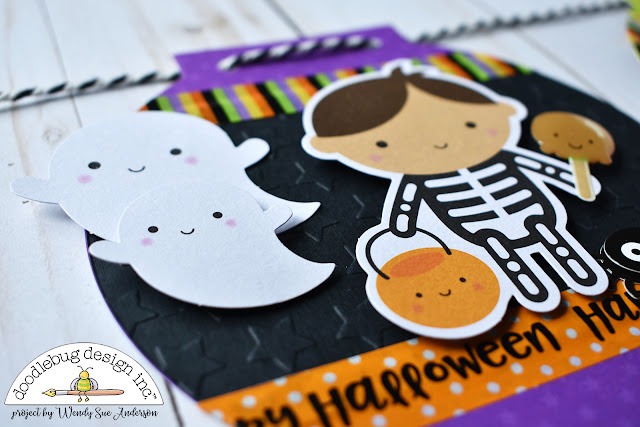
Each flag consists of a circle-shaped base (I actually used a die-cut meant for making a mini album):

"Booville" Halloween Trick-or-Treat banner by @WendySue for Doodlebug Design

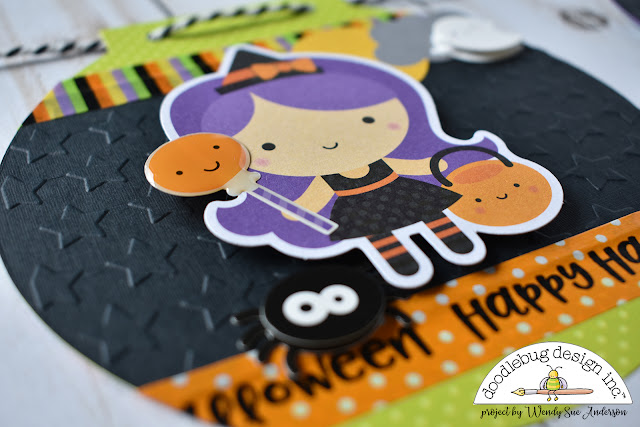
I used an embossing folder from Echo Park (linked below) for the subtle star pattern on the black cardstock!

"Booville" Halloween Trick-or-Treat banner by @WendySue for Doodlebug Design

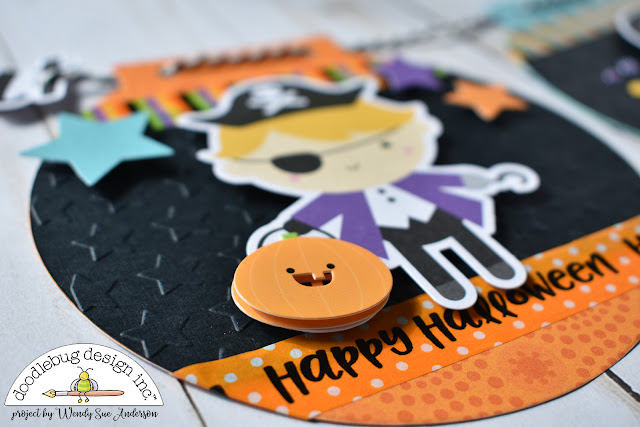
Each base has a strip of black cardstock in the center.  Before I added the black piece, I used a star embossing folder to add texture!

"Booville" Halloween Trick-or-Treat banner by @WendySue for Doodlebug Design

"Booville" Halloween Trick-or-Treat banner by @WendySue for Doodlebug Design

Next, I added two different styles of doodle tape to the top and bottom of each black piece.

"Booville" Halloween Trick-or-Treat banner by @WendySue for Doodlebug Design

"Booville" Halloween Trick-or-Treat banner by @WendySue for Doodlebug Design

Each trick-or-treater was placed on the black piece with foam adhesive - I just love adding extra dimension to my banners!

"Booville" Halloween Trick-or-Treat banner by @WendySue for Doodlebug Design

"Booville" Halloween Trick-or-Treat banner by @WendySue for Doodlebug Design

I used doodle-pops, sprinkles, and additional die-cuts to embellish each trick-or-treater and his background.
"Booville" Halloween Trick-or-Treat banner by @WendySue for Doodlebug Design

"Booville" Halloween Trick-or-Treat banner by @WendySue for Doodlebug Design

After all of the trick-or-treat flags were complete, I punched two holes in the top of each flag.
"Booville" Halloween Trick-or-Treat banner by @WendySue for Doodlebug Design

"Booville" Halloween Trick-or-Treat banner by @WendySue for Doodlebug Design

Chunky twine is perfect for stringing any banner!
"Booville" Halloween Trick-or-Treat banner by @WendySue for Doodlebug Design

"Booville" Halloween Trick-or-Treat banner by @WendySue for Doodlebug Design

It's worth another look to notice the CUTE shaped sprinkles and doodle pops in this collection!!
"Booville" Halloween Trick-or-Treat banner by @WendySue for Doodlebug Design

"Booville" Halloween Trick-or-Treat banner by @WendySue for Doodlebug Design

And in the middle of the trick-or-treat parade is the perfect place to add some words!

"Booville" Halloween Trick-or-Treat banner by @WendySue for Doodlebug Design

And with that, I'm off to make something else with the Booville collection to add to my fun and colorful Halloween decor!

Supplies: